(This article was originally published in "Games
International", issue #12 (January 1990) and is reproduced here with the permission
of Brian Walker, the former editor of GI)
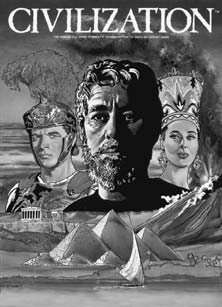
Strategy Seminar
Steve Jones dons his toga and provides a comprehensive guide to the great
game of aspiring cultures.
CIVILIZING INFLUENCES
In purely abstract game terms, Civilization is a steeplechase race game; I
shall elaborate upon this theme as the article develops. Looked at in this light, the
game may seem quite ordinary. What elevates it to a classic is a combination of two
things: the subject matter (or the 'chrome' aspect of the game), and the
wonderfully balanced and rich structure of the rules. The latter moulds the game into one
with elevated player interaction in ways which are complex, subtle and shifting, and yet
are always under the players' collective control. In my opinion, Civilization
is quite simply the best multi-player board game ever invented.
The subject matter of the game is an attractive and evocative one. It concerns the
growth and development of the ancient civilisations around the shores of the
Mediterranean Sea, and in the Middle East.
Each player starts off in control of a nomadic Stone Age tribe which then proceeds to
develop a highly advanced classical civilisation over the course of millennia. The object
of the game could not be simpler: it is to gain a state of overall advancement, involving
cultural, economic and political factors, faster than anyone else. Although this makes
the game into a race, it is vitally important to realise that it is one conducted on
several different levels.
It is also important to realise that it is a game which megalomaniacs always lose. War
is available as an instrument of policy, but the game is so structured as to make it into
a blunt and relatively inefficient one. The more efficient means available to combat your
opponents are, to a greater or lesser extent, subtle, hidden, indirect, sophisticated,
and 'civilised'.
THE KNOWN WORLD
The game consists of a map board,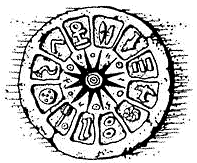 an Archaeological Succession Table (AST),
eleven sets of trade cards, sixteen sets of civilization cards and seven sets (nine in
the Avalon Hill version) of faction counters. The map board consists of three leaves
(West, Central and East) depicting a region stretching from Sardinia in the west to the
head of the Persian Gulf in the east, and from the upper Nile Valley in the south to the
southern Ukraine in the north. Hartland have recently released an expansion kit
containing a fourth leaf (WXB) which extends the map westwards to take in Iberia.
The map is divided into land and sea zones in much the same way as Diplomacy
and Risk. The sea zones are subdivided into two types: coastal and open. The land
zones each have a population carrying capacity indicated by a number. Some of the land
zones also contain natural city sites. The map features, in addition, four flood plains
and three volcanoes; there is a fifth flood plain on the WXB extension leaf.
The faction counters each consist of fifty six tokens, nine cities and four ships. One
token is used as a marker on the AST, and the remainder may be used to represent either
population on the board or money in the player's treasury. Depending upon the number
of players in the game, the players are limited to a specific number of tokens each. This
last is a deliberate design feature in the game. The main problem that the players
continually face is one of limited resources. The subdivision of the each player's
finite number of tokens among population on the board, money in his/her treasury, and
his/her stock (tokens currently not in play) is a brilliant design mechanism for creating
this shortage.
During the course of the game, there is a constant flow of tokens between a
player's stock on one hand, and the board and his/her treasury on the other.
Furthermore, this flow is more or less under the player's control. Nevertheless,
players will find themselves facing problems, and occasionally windfalls, depending upon
where their tokens are currently located. There are many subtle aspects to the management
of the token flow, and players should acquaint themselves with these.
COMMODITIES
There are seventy four trade cards in the game.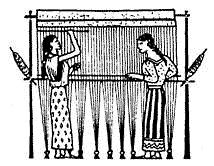 Of these, sixty six represent
eleven commodities which have values from one to nine. The remaining eight cards
represent calamities (more commonly known as disasters), and these all have value zero.
The commodity cards are initially stacked, face downwards, in nine decks, each deck
corresponding to the value of the commodities in it, and the calamity card of the
appropriate type is placed at the bottom of each deck except the first.
The eleven commodities are Ochre, Hides, Papyrus, Iron, Salt, Grain, Cloth, Bronze,
Spice, Gems and Gold; the first two have value one, the second two have value two, and
the remaining seven have the values ranging from three to nine in order. When more than
one card of a given commodity is held the net value of the collection is greatly
increased. The formula for finding the total value of several cards of the same commodity
is to multiply the square of the number of cards held by the commodity value; for
example, five grain are worth (5x5) x 4 = 100.
During the course of the game, each player takes the top card from each trade deck for
each city he/she has, and uses these to construct packages for trade with the other
players. Through trade, the aim is to increase the net value of the commodities held in
hand, and to use these to purchase civilization cards. The trade system is one of barter
involving trade cards alone. Any number of trade deals may be made between the players,
two at a time. In each trade deal, each player must offer at least three trade cards,
correctly quote the total value of the package and correctly give the commodity of one of
them; outside of these restrictions, anything can be said about the package. This last is
important because trading does carry risks: some of the disaster cards can be passed on
in a trade deal.
DISASTERS
The eight disasters are Volcano/Earthquake, Famine, Civil War, Flood, Epidemic, Civil
Disorder, Iconoclasm & Heresy, and Piracy. The first four are so-called red-backed
disasters and affect the players who pick them up. The last four, on the other hand, are
so-called black-backed disasters and can be passed on to another player through a trade
deal; the disaster then affects that player!
As the names suggest, it does not help your aspiring civilisation to be affected by
one of these disasters. Players will find it essential to acquaint themselves with the
effects of the disasters, how to lessen their effect, how to direct them at their
opponents, and how to reduce the chances of receiving one. In practice, it is impossible
to avoid disasters completely. This is because an individual disaster does not affect
only the player who received the card; that player may also, depending upon the exact
nature of the disaster, 'distribute' its effects among the other players! This is
just another one of the wonderful balancing mechanisms in the game.

If trade cards constitute the major currency in Civilization, civilization cards must
be considered to be the raison d'etre of the game, and the focus of all
actions. There are seventy two civilization cards representing sixteen different aspects
of civilisation. They are divided into four colour groups representing broad areas of
human knowledge/endeavour. Most cards are members of only one group, but some are members
of two. The groups are Arts (blue), Crafts (orange), Sciences (green) and Civics (red).
The sixteen card types are Mysticism, Cloth Making, Pottery, Drama & Poetry, Music,
Architecture, Astronomy, Metalworking, Agriculture, Coinage, Literacy, Engineering,
Medicine, Law, Democracy, and Philosophy. They each have a value of between 30 and 240;
the purchase price is equal to the card value but, in practice, it may be decreased by
cards already held.
Each type also has an effect on play, usually by modifying some aspect of the normal
rules. They are obtainable by exchanging trade cards and treasury of at least the same
value. They can be relatively costly, and there may be a shortage of the various types
depending upon the number of players in the game. If the latter is the case, you will
find yourself competing with your opponents for a very limited resource, particularly so
in the case of the more expensive cards. This has a considerable effect upon long term
strategy, of which more anon.
RACE TRACK
The AST is the race track of the steeplechase alluded to earlier on. It is essentially
a non-linear timeline consisting  of fifteen time steps, plus start and finish
positions, and covering the period from 8000 BC to 250 BC. The non-linear nature of the
timeline is evident from the fact that the first time step covers a period of three
thousand years while the last step covers less than one hundred years. The timeline is
further subdivided into nine independent tracks, each associated with a starting area on
the map board and named after the various ancient civilisations and/or regions. These
are, in the order 'down' the table: Africa, Italy, Illyria, Thrace, Crete, Asia,
Assyria, Babylon and Egypt.
The WXB map leaf adds an extra track for Iberia and a modified African track which is
only used if the WXB leaf is in  play; in addition, Italy is not used when the WXB
leaf is in play. Each track is divided into five numbered epochs identified as New Stone
Age, Early Bronze Age, Late Bronze Age, Early Iron Age, and Late Iron Age. Furthermore,
the epochs are not of the same length on the different tracks; this can have an enormous
effect on the choice of strategy of the different countries.
At the end of every turn, the AST tokens are usually moved forward one step; therefore
the game is at least 16 turns long. However, entry to a new epoch requires the fulfilment
of a minimum condition which depends upon the new epoch. The second epoch requires two
cities, the third requires civilization cards representing three groups, the fourth
requires seven civilization cards, and the fifth requires civilization cards totalling at
least 1000 points. Once in the fifth epoch, the player needs a stated value on the AST to
move forward; this time the value of treasury and trade cards may be included in the
total. In addition, in any epoch except the first, the token is moved backwards if a
player has no cities! It should now be clear why the game can be likened to a
steeplechase. Nearly every decision which a player makes during the course of a game
should be geared towards keeping that token moving on the AST. One of the things which
make the game into a classic is the fact that some of your actions can also be directed
to affect the movement of your opponents' tokens along the AST.
ORDER OF PLAY
Each game turn is subdivided into thirteen separate phases. These are Taxation and
Revolts, Population Expansion, Census, Ship Construction, Movement, Conflict, City
Building, Trade Card Acquisition, Trade, Civilization Card Acquisition, Calamity
Resolution, Excess Trade Card Surrender, and AST Movement. In many of these phases, the
order of play will often change from turn to turn, and it is vital to become thoroughly
familiar with all the ramifications of this. This variable order of play is a
self-balancing mechanism that has been deliberately built into the game's structure.
It is well worth briefly discussing the eight cases in each game turn where an order of
play is important.
Taxation
In the Taxation phase, any players who have insufficient tokens in their stocks to pay
the taxation on their cities will lose to a revolt those cities which cannot pay. The
cities in revolt go over to the player with the most tokens in his/her stock after taxes
have been paid. The order in which revolts occur is in AST order, and if two players both
have the same maximum number of tokens in their stocks, the recipient is decided in AST
order.
Thus revolts generally occur to empires which have grown too big in some
uncontrollable manner, and the recipient of cities in revolt is invariably the smallest
empire on the board. However, it should be noted that revolts are, by and large, fairly
rare, and usually result from player incompetence. The one exception is that a revolt can
be engineered if the player concerned was nominated in a civil war in the previous rum,
and this resulted in him/her having too many cities and too few tokens in stock!
Ship construction
In the Ship Construction phase, players should build and/or maintain ships in AST
order. In practice, players tend to do this simultaneously as the rule is not explicit,
but is implied by Rule [62] on page 16 of the rule book. However, players further down
the AST are perfectly within their rights to insist upon strict AST order being observed.
There are occasions when a player's decision of whether or not to build or maintain
ships will critically depend upon what other players have decided. If those players are
higher up the AST, just watch what they do and make your decision accordingly.
Movement
In the Movement phase, movement is sequential in the order of the largest to the
smallest populations, with ties being resolved in AST order. Since combat occurs more or
less simultaneously, it is a disadvantage (except in the early turns) to move first, and
the player moving last can possess an enormous strategic advantage. This is probably the
single most important balancing mechanism in the game. In practice, it makes it virtually
impossible to eliminate players, and gives small empires a defensive edge over their
larger neighbours.
Conflict
In the Conflict phase, the order of play is only important if a token shortage is
possible. Then, a player under attack may insist upon resolving first all conflicts
involving only tokens, before dealing with those involving tokens attacking cities.
This is particularly important because conflicts between tokens and cities require the
defending cities to convert into at least six tokens; if there are insufficient tokens in
the player's treasury, the city will surrender.  The rule governing the surrender
of cities implies that the best time to attack another player's cities is when he/she
has few or no tokens in his/her stock, and then, the attack should be a limited one
directed only at cities.
City building
In the City Building phase, play is in AST order. As with ship construction, city
building is not simultaneous, and a player is perfectly entitled to insist upon players
higher up the AST making their decisions first, as to whether to build any more cities.
The reasons for insisting on this are subtle.
First, it should be pointed out that the rules do not compel a player to build a city
if the conditions for city construction are satisfied; the players have a choice as to
whether or not to add to their city numbers. The reason for the players having this
choice is to enable them to manipulate the order of play in the Trade Card Acquisition
phase so as, on the one hand, to maximise the number of trade cards they acquire, and on
the other, to avoid disasters. Only the very best players will be constantly aware of
this stratagem during the hurly-burly of play.
Trade card acquisition
In the Trade Card Acquisition phase,  the order of play is from the smallest to the
largest (in terms of cities), with ties being resolved (yes, you guessed it) in AST
order. This is yet another of the wonderful subtleties of the game. It is deliberately
designed to ensure that the largest empires pick up their trade cards last and, in so
doing, increases the chances that they will end up getting fewer cards than their smaller
neighbours.
There is no point in having more cities than anyone else if this results in you
gaining fewer trade cards than anyone else simply because the trade decks were depleted
prior to your turn to pick up! The good players will be aware of this, and will carefully
adjust the size of their empires according to what the other players are doing.
When it comes time to exchange trade cards for civilization cards, the order of play
is in reverse AST order. This is the only instance in the game where this occurs. All
things being equal, the players at the bottom of the AST normally have a higher chance of
finding some of the trade card decks depleted when they pick up their cards. To offset
this, they are given the first opportunity to purchase the relatively rare civilization
cards.
Calamity resolution
In the Calamity Resolution phase, the order of play goes in ascending order of the
disaster number. This can be important for players affected by more than one disaster,
since it can mitigate the effect of the later disasters. For instance, if a player has
picked up both the Famine and Flood cards, he could lose tokens on his/her flood plain to
the famine and end up avoiding the flood completely.
STRATEGY
Now that you have some idea of how the game is played, and how its many components
interact with each other, how do you develop a winning  strategy? One aspect of this game is that there is no one, single winning strategy.
There is, however, a winning approach to how the game should be played, which consists of
six maxims.
The first maxim is to achieve the maximum population growth in the first five or six
turns without affecting your progress on the AST. This involves delaying building your
first cities as long as possible, and spreading out to occupy as much territory as is
possible without becoming involved in fruitless border disputes. If you delay building
your first city until the fifth turn, you can have six cities by the sixth turn. In
contrast, building two cities in the fourth turn leaves you so short of population that
you will have only three cities in the sixth turn; this will leave you short of trade
cards in the early trading sessions.
The second maxim is to aim to have a medium number of cities throughout most of the
second to the fifth epochs; the ideal number is six or seven, depending upon
circumstances. Sticking to this should, on average, maximise the number of trade cards
picked up every turn. It should also make it easier to manipulate your place in the order
of play so as to avoid the worse disasters.
The third maxim is to maintain a healthy distribution  of
your tokens between the stock, treasury and map, and to avoid where possible having too
many tokens in one of these three locations. This should ensure that you are in the best
position to avoid the problems associated with over-population and inflation. There are
four ways of controlling your token distribution: deliberately killing off population on
the board by over-stacking, maintaining four ships on the board, partly paying for
civilization cards with treasury tokens, and purchasing the Coinage card as soon as
practically possible.
The fourth maxim is to offer mutually profitable trade deals wherever possible. It is
not a good idea to squeeze the last drop out of a trade deal. It is also good policy to
be truthful about your trade packages (except, of course, when you are attempting to pass
on a disaster card). If you follow this maxim consistently, players will tend to want to
deal with you in the future because they will know they are going to get a square
deal.
The fifth maxim concerns the ideal policy on how to distribute disasters should you be
unfortunate enough to get landed with one. In the early stages up until the end of the
Bronze Age, the best policy is to distribute disasters evenly amongst the other players.
Even so, there are occasions when somebody will be particularly deserving of the maximum
permissible dose, and that is perfectly acceptable should it occur. However, later on,
from about the start of the Iron Age onwards, disasters should be directed exclusively at
the leaders wherever possible in an attempt to slow down, or even stop, their progress on
the AST.
The sixth, and final, maxim is to maintain a low profile on the map, and a high one in
the trading sessions. In particular, don't make unnecessary waves such as launching
unprovoked attacks on your neighbours. If you have to attack somebody, make sure it is
for a good reason, and immediately apologise, explaining your reasons for the attack.
And, above all, maintain a flexible approach in your actions at all times.
CALAMITIES
Following on from the general considerations discussed above, I shall continue the
discussion of game strategy by considering the eight disasters and the ten starting
positions, and finish up with some observations about trading and the best mixes of
civilization cards to aim for.
As observed earlier in this article, the disasters are subdivided into two blocks,
 those which affect the player who picked the card up, and those which affect the
player to whom the card was passed in a trade deal. The former consists of
Volcano/Earthquake, Famine, Civil War and Flood, while the latter consists of Epidemic,
Civil Disorder, Iconoclasm & Heresy and Piracy. Before we discuss each of them in
turn, an important point should be made concerning the black-backed disasters in general.
If you pick one up, and decide to pass it on to another player in a trade deal, the
victim should be chosen carefully. By the time these cards turn up, it should be fairly
obvious who is doing well and who is doing badly. Under no circumstances should one be
passed on to the players who are doing relatively badly. These disaster cards are potent
weapons to be aimed only at the leaders. They are the most active traders in the game,
and they always want valuable cards. As soon as it becomes obvious during a trade session
what commodity one of the leaders is after, make up a trade package consisting of that
commodity and the disaster card and offer it him. And you should make sure the disaster
is well disguised, throwing in another relatively high value commodity if necessary.
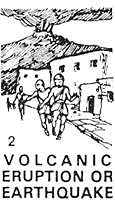
Volcano/Earthquake is the least damaging of all the disasters. 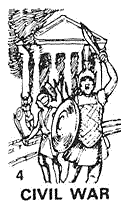 There are only three volcano sites on the map: Vesuvius and Etna in Italy, and
Santorini in the Aegean Sea. If any of your tokens or cities are on one of these volcano
sites, the volcano erupts and all units are lost. If you do not occupy a volcano site,
one of your cities is struck by an earthquake and is reduced instead; this involves
replacing the city with a number of tokens equal to the carrying capacity of the
area.
The best means of mitigating the effect of this disaster depends upon whether you have
a volcano or an earthquake. If it is a volcano, place population tokens only in the
volcano sites. Although all the volcano sites are natural city locations, it is not a
good idea to set up a city in one of them because it relatively difficult to rebuild it.
If, on the other hand, it is an earthquake, it is best to choose a city located in a high
population carrying capacity area since this makes it easier to rebuild. The only
exception to this is if you have a city on a 3-site, and reduction will lead to a token
shortage in your stock and taxation problems in the next turn. If you have a city located
adjacent to another player's city, you have the option of reducing that player's
city as well; whether you do so will depend upon the game position at that time, and it
is best to follow a flexible policy on this. You might even be able to force some favour
out of that player in exchange for not doing it!
Famine is a mixed disaster. 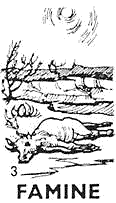 Although it forces you to lose nine units (cities
counting as five units equivalent), you can force other players to lose up to twenty
units, with a maximum of eleven from any one player. For this reason, it is one of the
'best' of the game-balancing disasters. The effect of the disaster can be
mitigated if you possess Pottery and at least one grain; in this case, for every grain
card held, you reduce the number of units lost by four. This is obviously the perfect
defence against famine, but it does have the double drawback that Pottery is one of the
cheapest civilization cards available and it ties up grain cards which might be better
used either in obtaining better trade deals or in purchasing another civilization
card.
Civil War is one of the most potentially crippling of the disasters. 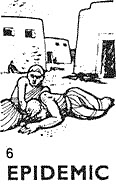 If
you have picked it up, you choose a nominee from among the other players. You and your
nominee then divide your civilisation into two parts; you choose one, and your nominee
gets the other! Usually, one of the parts must contain thirty five units (with cities
again counting as five units equivalent), provided you do not hold Philosophy and/or
Democracy. If you hold Philosophy, your nominee must be the player with the least number
of tokens in his/her stock, (this might be you!) and fifteen units secede to the nominee.
If you hold Democracy (and not Philosophy), one of the two parts must contain forty five
units.
If
you have picked it up, you choose a nominee from among the other players. You and your
nominee then divide your civilisation into two parts; you choose one, and your nominee
gets the other! Usually, one of the parts must contain thirty five units (with cities
again counting as five units equivalent), provided you do not hold Philosophy and/or
Democracy. If you hold Philosophy, your nominee must be the player with the least number
of tokens in his/her stock, (this might be you!) and fifteen units secede to the nominee.
If you hold Democracy (and not Philosophy), one of the two parts must contain forty five
units.
The one certain way to avoid the effects of Civil War is to keep your civilisation to
thirty five units or less (or forty five if you hold Democracy). Another method is to
maintain a mental count of the number of grain cards in the grain deck, and thereby know
when the Civil War card will turn up. Then, by manipulating the number of cities you own,
it is possible to avoid picking the card up.
If, despite all your efforts, you do pick up Civil War,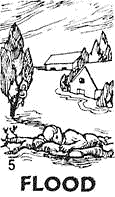 there are two ways to mitigate its effect. If you have a very big civilisation, choose as
your nominee a player with an equally big civilisation. Careful calculation may ensure
that the nominee will lose most of the seceding units by revolt because of token and city
shortage, and you might get them back provided you have the most tokens in your
stock.
The second way is to choose as your nominee the player with the weakest position and
make him an offer. This will usually involve the nominee choosing those units whose loss
is least damaging to your overall position. Whatever way, Civil War is always vicious; do
everything you can to avoid it.
Flood is the last of the red-backed disasters, and the easiest to absorb. If you have
no flood plain in your civilisation, the only damage is missing out on picking up a
valuable cloth card. If you do have a flood plain, the best policy is to keep it lightly
populated, avoid building cities in it unless the site is elevated above the plain, and
get Engineering as quickly as possible.
If you have been counting the cloth cards, and suspect that you will pick up
flood,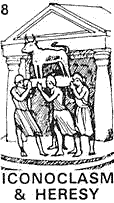 it might be worthwhile moving some tokens into someone else's flood
plain; that player's units will be affected by the disaster as well!
Epidemic is the first of the black-backed disasters. The recipient loses sixteen
units, and these losses must be taken with no area being completely depopulated; thus, a
city is replaced by one token and counts as a loss of four. The recipient may then spread
the epidemic among the other players, forcing them to lose up to twenty five units, with
no more than ten from any one player. However, the player who passed on the Epidemic card
is immune to this spread of the epidemic; the lack of side-effects makes this disaster a
good one to pass on. The effect of an epidemic can be mitigated to some effect if you
hold Medicine. Should the card be traded to you, you can at least affect your rivals for
the lead. Consequently, the Epidemic is probably the least terrifying of the tradable
disasters.
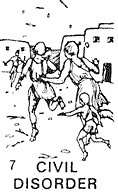 The effect of the Civil Disorder disaster increases with the civilisation
size. Provided the recipient has more than four cities, and does not hold Law or
Democracy, the excess are reduced. If the recipient holds Law, only cities in excess of
five are reduced, and if he/she holds Democracy, cities in excess of six are reduced.
Civil Disorder is a good card to trade to one of the leaders for two reasons. The first
is that the leaders usually have a large number of cities, and this disaster can chop
them down in size considerably. The second is that the recipient is the only player to
suffer, and the player who traded it suffers no side-effects apart from the victim's
wrath.
Iconoclasm & Heresy is a terrible disaster, particularly for players who do not
hold Law or Philosophy. In this case, the recipient loses four cities by reduction.
Unlike Civil Disorder, he/she may also order the reduction of two cities owned by the
other players, including the player who traded the card! If the recipient holds Law, only
three cities are reduced, and if he/she holds Philosophy, only two cities are reduced.
Similar decreases apply to the recipient's counterattack. However, the one to watch
out for is the combination of Civil Disorder with Iconoclasm & Heresy. This can be a
killer for anyone without Law: the former reduces the recipient to four cities, and the
latter knocks these out! This, in turn, forces the recipient backwards on the AST; this
combination should be exclusively aimed at the leader if at all possible.
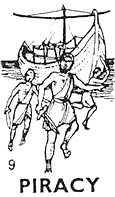
Piracy is potentially the worse disaster of all. The recipient loses one coastal city
for every ship owned by the player who traded the card. Consequently, the recipient could
lose up to four cities. If this should happen, the effect is worse than Iconoclasm &
Heresy since, in that case, the cities are only reduced, whereas piracy removes the city
completely, and leaves nothing behind. An obvious motto comes immediately to mind: be
wary of 'Greeks bearing gifts' - especially in ships!
STARTING POSITIONS
The ten starting positions are not all equal; the ones with better  potential usually have a combination of excellent terrain to expand into and a
relatively easy track on the AST. I shall now consider them in AST order.
Africa
Africa has one of the easiest tracks on the AST, as well as a low end-game target
total of 1200 points. Its position at the head of the AST also makes it relatively easy
to avoid disasters, but is a disadvantage when purchasing civilization cards. This
implies that you must look ahead when planning what to purchase.
The AST advantages are offset by Africa's poor lebensraum, and this is made more
critical by the location of the natural city sites in the best population areas. Africa
should therefore build at least one of the famous 'desert' cities (twelve tokens
converted into a city in one of its 1-areas), claim as much of north Africa as possible,
and should be prepared to go to war over Sicily. Agriculture is an essential acquisition
given the lack of breathing room. These problems are reduced by the WXB leaf, and this
has been offset by the larger end-game target of 1300 points.
Iberia
Iberia has a relatively easy track on the AST, and a low end- game target of 1200
points. This is offset by a lack of natural city sites, one of which is in a flood plain.
Although Italy is not in play when the WXB leaf is used, most of the Italian peninsula
will have been claimed by the time you get there. Build a couple of 'desert'
cities in Iberia, and try to get Agriculture.
Italy
Italy is one of the blue chip starting positions, possessing an easy track on the AST,
plenty of natural city sites, and a medium end-game target of 1300 points. Aim to occupy
all of the Italian peninsula, and the Balkan coast as far south as Corfu. It really is
too easy playing Italy and the other players should be aware of it.
Illyria
Illyria is a very difficult starting position. ('What should I do in
Illyria?') This is because its two neighbours Italy and Thrace have easier AST tracks
and consequently tend to be chosen first. If this happens there is nowhere to expand
into, and the position should not be chosen. However, if the WXB leaf is in use, Illyria
effectively takes up Italy's position in the standard game. Its slightly more
difficult AST track and maximum end-game target of 1400 points balances this part of the
map out nicely. You can now have a viable game with it.
Thrace
Thrace has an AST track of about the same degree of difficulty as Italy's.
However, it suffers from a lack of natural city sites, and the Danube Delta flood plain.
Consequently, it should insist upon a frontier with Italy located as far west  as
possible, and a frontier with Asia/Assyria as far east in southern Ukraine as possible.
It would also be an advantage to acquire Agriculture.
Crete
Crete's central starting location is a relatively difficult one, offset partly by
its low end-game target of 1200. Although there is no shortage of city sites in Greece
and Asia Minor, there is a lack of breathing space. This is accentuated by the necessity
to build ships to get off the island of Crete in the early stages. Once these ships have
been built, Crete always moves last in the race to occupy as much land as possible before
the first bout of city building. Consequently, you should concentrate upon creating a
constantly mobile population, and the acquisition of both Agriculture and Astronomy are
essential.
Asia
Asia has a relatively difficult AST track, which is not helped by the high end-game
target of 1400. It also tends to be crowded out by Assyria. Consequently, it is advisable
to choose Asia only if Babylon has not been chosen; in this case, Asia and Assyria have
plenty of room to expand into. If Assyria and Babylon have already been chosen, avoid
Asia like the plague.
Assyria
Assyria is another blue chip starting position to rank along side Italy. However, its
slightly harder AST track and higher end-game target of 1400 make it more of a challenge
to play. You should aim to expand into Asia Minor and to the Med coast at Antioch,
working out sensible frontiers with Crete and Babylon. If Asia is in play in place of
Babylon, it is probably best to let Asia have Asia Minor, and take over the normal Baby
Ionian position yourself. However, allowing Asia through into the Babylonian position is
equally viable.
Babylon
Babylon has an excellent area to expand into on the map, despite the huge Euphrates
flood plain. However, its AST track is extremely difficult because of the early first
barrier. Against good players, the best policy is probably to go for maximum city
expansion in the early stage and take a deliberate stop for one turn at the first
barrier. You will then have to attempt to ensure that all the other players make at least
one stop later in the game. If Egypt is also in the game, and follows the same policy, it
is advisable to cooperate closely with him/her on this. Apart from this, it is advisable
to avoid building more than one low lying city on the flood plain unless it is absolutely
necessary.
Egypt
Egypt has a similar problem to Babylon, and should follow a similar policy. It is
essential to expand into Palestine and claim as many of the city sites there as possible.
It is also advisable to agree to a sensible frontier with Africa and thereby avoid
trouble on that side. And whatever you do, avoid building cities in the Nile Delta if at
all possible.
TRADING
In the trading sessions, your primary aim should be to build up a set of trade cards
with a value as large as possible. This generally means concentrating on one commodity at
a time, and trying to corner the market in that commodity. The best commodities to
concentrate upon are Salt, Grain, Cloth, Bronze and Spice. The first four commodities
tend to be used as short change to fill up a trade package, but if you manage to make up
a full set they complement your hand very nicely. Although Gems and Gold can make up
substantial sets, there are not many of them, and the number of players with eight or
nine cities is usually low. Even if you do not have nine cities, it is useful to convert
eighteen tokens in your treasury whenever possible. It gains you a useful card to trade
with players who do have nine cities, and helps relieve your inflation problems. It is
also a good idea to offer trade packages of four or more cards every now and then; this
may make it easier to conceal a disaster card in the deal if that opportunity arises.
CARDS
There is no ideal set of civilization cards to collect.  If
somebody maintained that such a set existed, the maximum limit of eleven cards per player
would make things very tight in the five, six and seven player games. However, some
general guidelines can be given. Any winning set must contain at least two of the three
civic cards Law, Philosophy and Democracy, and preferably all three. The easiest way to
acquire Law is to pick up Literacy and Architecture first; together, they knock forty
points off the price of Law. Philosophy can purchase very cheaply if you also acquire
Music and the five science cards: Mysticism, Astronomy, Coinage, Medicine, and
Engineering; this reduces the price of Philosophy to seventy. The purchase price of
Democracy can be reduced to one hundred and ten with the additional purchase of the four
craft cards Pottery, Cloth Making, Metal Working and Agriculture.
The order in which you purchase your cards should be partly decided by two criteria.
The first is to buy them in the sequence which makes the entire set you aim to collect as
cheap as possible. The second criterion should be based on whether the purchase advances
you past all barriers on the AST in the shortest number of turns. The problem here is
that getting past one barrier 'easily' may create problems at the next barrier.
The most critical example of this dilemma is evidenced by a decision to purchase lots of
cheap cards in order to obtain the seven cards required to pass the third barrier; this
may make it extremely difficult to acquire an additional four cards with the values
required to push your net total to the one thousand points required to pass the fourth
barrier. However, it is sometimes not possible to stick to these criteria. This is
usually caused by buying pressure on specific cards.
The trickiest decision to be made is usually connected with the order in which the
cards belonging to a particular colour group are bought. The natural order is to buy from
cheapest to dearest, largely because this makes it easier to pass the early barriers.
However, it can be advantageous to buy some of the expensive ones first in order to
create a shortage in them. This is a particularly important consideration in the five,
six and seven player games.
The mix of civilization cards to aim for is also critically determined by the number
of players in the game. If the number is four or less, there is no card shortage, and it
is generally best to aim for the high value cards unless this causes problems during the
approaches to the barriers on the AST. With larger numbers of players, it is worthwhile
going for some of the cheaper cards if only to ease your passage along the AST. However,
you must make sure, firstly, that you pick up a substantial proportion of the highest
value cards, and secondly, that your main rivals miss out on more of them.
In conclusion, Civilization is an excellent multi-player game for those who
like long games which require considerable thought, concentration and decision making. As
a final point, I'll leave you with a recommendation not to use the Avalon Hill
expansion set. The additional trade cards mean that the disasters are less frequent, and
this upsets the entire play balance of the game.
Civilization is a game for two to seven players; designed by Francis Tresham
and originally published by Hartland Trefoil; it is now also marketed under licence by
Avalon Hill and Gibsons Games. Players should be aware of which set they are playing
with: there are slight differences, principally in the sequence of play, between the
Hartland rules and the Avalon Hill rules.
 an Archaeological Succession Table (AST),
eleven sets of trade cards, sixteen sets of civilization cards and seven sets (nine in
the Avalon Hill version) of faction counters. The map board consists of three leaves
(West, Central and East) depicting a region stretching from Sardinia in the west to the
head of the Persian Gulf in the east, and from the upper Nile Valley in the south to the
southern Ukraine in the north. Hartland have recently released an expansion kit
containing a fourth leaf (WXB) which extends the map westwards to take in Iberia.

 Of these, sixty six represent
eleven commodities which have values from one to nine. The remaining eight cards
represent calamities (more commonly known as disasters), and these all have value zero.
The commodity cards are initially stacked, face downwards, in nine decks, each deck
corresponding to the value of the commodities in it, and the calamity card of the
appropriate type is placed at the bottom of each deck except the first.
 of fifteen time steps, plus start and finish
positions, and covering the period from 8000 BC to 250 BC. The non-linear nature of the
timeline is evident from the fact that the first time step covers a period of three
thousand years while the last step covers less than one hundred years. The timeline is
further subdivided into nine independent tracks, each associated with a starting area on
the map board and named after the various ancient civilisations and/or regions. These
are, in the order 'down' the table: Africa, Italy, Illyria, Thrace, Crete, Asia,
Assyria, Babylon and Egypt.
 play; in addition, Italy is not used when the WXB
leaf is in play. Each track is divided into five numbered epochs identified as New Stone
Age, Early Bronze Age, Late Bronze Age, Early Iron Age, and Late Iron Age. Furthermore,
the epochs are not of the same length on the different tracks; this can have an enormous
effect on the choice of strategy of the different countries.
 The rule governing the surrender
of cities implies that the best time to attack another player's cities is when he/she
has few or no tokens in his/her stock, and then, the attack should be a limited one
directed only at cities.
 the order of play is from the smallest to the
largest (in terms of cities), with ties being resolved (yes, you guessed it) in AST
order. This is yet another of the wonderful subtleties of the game. It is deliberately
designed to ensure that the largest empires pick up their trade cards last and, in so
doing, increases the chances that they will end up getting fewer cards than their smaller
neighbours.
 strategy? One aspect of this game is that there is no one, single winning strategy.
There is, however, a winning approach to how the game should be played, which consists of
six maxims.
 of
your tokens between the stock, treasury and map, and to avoid where possible having too
many tokens in one of these three locations. This should ensure that you are in the best
position to avoid the problems associated with over-population and inflation. There are
four ways of controlling your token distribution: deliberately killing off population on
the board by over-stacking, maintaining four ships on the board, partly paying for
civilization cards with treasury tokens, and purchasing the Coinage card as soon as
practically possible.
 those which affect the player who picked the card up, and those which affect the
player to whom the card was passed in a trade deal. The former consists of
Volcano/Earthquake, Famine, Civil War and Flood, while the latter consists of Epidemic,
Civil Disorder, Iconoclasm & Heresy and Piracy. Before we discuss each of them in
turn, an important point should be made concerning the black-backed disasters in general.
If you pick one up, and decide to pass it on to another player in a trade deal, the
victim should be chosen carefully. By the time these cards turn up, it should be fairly
obvious who is doing well and who is doing badly. Under no circumstances should one be
passed on to the players who are doing relatively badly. These disaster cards are potent
weapons to be aimed only at the leaders. They are the most active traders in the game,
and they always want valuable cards. As soon as it becomes obvious during a trade session
what commodity one of the leaders is after, make up a trade package consisting of that
commodity and the disaster card and offer it him. And you should make sure the disaster
is well disguised, throwing in another relatively high value commodity if necessary.
 There are only three volcano sites on the map: Vesuvius and Etna in Italy, and
Santorini in the Aegean Sea. If any of your tokens or cities are on one of these volcano
sites, the volcano erupts and all units are lost. If you do not occupy a volcano site,
one of your cities is struck by an earthquake and is reduced instead; this involves
replacing the city with a number of tokens equal to the carrying capacity of the
area.
 Although it forces you to lose nine units (cities
counting as five units equivalent), you can force other players to lose up to twenty
units, with a maximum of eleven from any one player. For this reason, it is one of the
'best' of the game-balancing disasters. The effect of the disaster can be
mitigated if you possess Pottery and at least one grain; in this case, for every grain
card held, you reduce the number of units lost by four. This is obviously the perfect
defence against famine, but it does have the double drawback that Pottery is one of the
cheapest civilization cards available and it ties up grain cards which might be better
used either in obtaining better trade deals or in purchasing another civilization
card.
 If
you have picked it up, you choose a nominee from among the other players. You and your
nominee then divide your civilisation into two parts; you choose one, and your nominee
gets the other! Usually, one of the parts must contain thirty five units (with cities
again counting as five units equivalent), provided you do not hold Philosophy and/or
Democracy. If you hold Philosophy, your nominee must be the player with the least number
of tokens in his/her stock, (this might be you!) and fifteen units secede to the nominee.
If you hold Democracy (and not Philosophy), one of the two parts must contain forty five
units.
If
you have picked it up, you choose a nominee from among the other players. You and your
nominee then divide your civilisation into two parts; you choose one, and your nominee
gets the other! Usually, one of the parts must contain thirty five units (with cities
again counting as five units equivalent), provided you do not hold Philosophy and/or
Democracy. If you hold Philosophy, your nominee must be the player with the least number
of tokens in his/her stock, (this might be you!) and fifteen units secede to the nominee.
If you hold Democracy (and not Philosophy), one of the two parts must contain forty five
units. there are two ways to mitigate its effect. If you have a very big civilisation, choose as
your nominee a player with an equally big civilisation. Careful calculation may ensure
that the nominee will lose most of the seceding units by revolt because of token and city
shortage, and you might get them back provided you have the most tokens in your
stock.
 it might be worthwhile moving some tokens into someone else's flood
plain; that player's units will be affected by the disaster as well!
 The effect of the Civil Disorder disaster increases with the civilisation
size. Provided the recipient has more than four cities, and does not hold Law or
Democracy, the excess are reduced. If the recipient holds Law, only cities in excess of
five are reduced, and if he/she holds Democracy, cities in excess of six are reduced.
Civil Disorder is a good card to trade to one of the leaders for two reasons. The first
is that the leaders usually have a large number of cities, and this disaster can chop
them down in size considerably. The second is that the recipient is the only player to
suffer, and the player who traded it suffers no side-effects apart from the victim's
wrath.
 potential usually have a combination of excellent terrain to expand into and a
relatively easy track on the AST. I shall now consider them in AST order.
 as
possible, and a frontier with Asia/Assyria as far east in southern Ukraine as possible.
It would also be an advantage to acquire Agriculture.
 If
somebody maintained that such a set existed, the maximum limit of eleven cards per player
would make things very tight in the five, six and seven player games. However, some
general guidelines can be given. Any winning set must contain at least two of the three
civic cards Law, Philosophy and Democracy, and preferably all three. The easiest way to
acquire Law is to pick up Literacy and Architecture first; together, they knock forty
points off the price of Law. Philosophy can purchase very cheaply if you also acquire
Music and the five science cards: Mysticism, Astronomy, Coinage, Medicine, and
Engineering; this reduces the price of Philosophy to seventy. The purchase price of
Democracy can be reduced to one hundred and ten with the additional purchase of the four
craft cards Pottery, Cloth Making, Metal Working and Agriculture.